Issue: Not able to configure email settings and/or not able to get a successful e-mail test on your Insteon IP Camera
Solution: Please see below for common SMTP Settings. (Note, while these settings work for most users, you may need to contact your email provider for you specific settings)
Aol:
smtp server: smtp.aol.com
smtp port: 587
Transport layer security: starttls
Apple/iCloud/Me:
smtp server: smtp.mail.me.com
smtp port: 587
Transport layer security: starttls
AT&T/SBC Global:
smtp server: smtp.att.yahoo.com
smtp port: 465
Transport layer security: tls
Comcast:
smtp server: smtp.comcast.net
smtp port: 465
Transport layer security: tls
Gmail:
smtp server: smtp.gmail.com
smtp port: 587
Transport layer security: starttls
Hotmail/MSN/Outlook/Live:
smtp server: smtp.live.com
smtp port: 587
Transport layer security: starttls
RoadRunner:
smtp server: smtp-server.<location>.rr.com
smtp port: 587
Transport layer security: starttls
Time Warner:
smtp server: mail.twc.com
smtp port: 587
Transport layer security: starttls
Verizon:
smtp server: smtp.verizon.net
smtp port: 587
Transport layer security: starttls
Yahool:
smtp server: smtp.mail.yahoo.com
smtp port: 465
Transport layer security: tls
Insteon Camera - invalid params
Symptoms
The Insteon Camera is generating the following error anytime you attempt to save any changes:
invalid params
Causes
The error is cause by invalid characters in the Username or Password of the camera
! @ # $ % ^ & * ( ) - +
Resolution
You will need to factory reset the camera and begin setup from the beginning. You are not able to change the username or password in the camera, as the existing login information is invalid.
Indoor Camera Factory Rest Steps:
Step 1: On the bottom of the camera locate the hole in the bottom of the camera marked RESET.
Step 2: Using a paperclip or similar object to press an hold the RESET button for 30 seconds.
Step 3: The camera will start to pan and tilt within 30 seconds of the reset.
Step 4 Wait 90 seconds before beginning again.
Outdoor Camera Factory Reset Steps:
Step 1: On the cable bundle, locate the reset button
Step 2: Press and hold the reset button for 30 seconds then let go.
Step 4: Wait 90 seconds before beginning again.
Insteon SD WiFi Camera Setup Videos
The links below will take you to specific video tutorials that will help you set up your new SD Insteon wireless IP camera.
Optional Camera steps:
The steps shown in these videos will work for either the Indoor Wireless IP Camera or the Outdoor Wireless IP Camera.
If you are not using your Insteon camera with the Insteon Hub, we recommend the following third party apps:
iOS - CamViewer, Foscam Pro, Live Cams Pro, OWLR
Android - IP CamViewer, TinyCam Monitor, NetEye Camera, OWLR
Windows Phone - IP Cam Controller
Configure Port Forwarding for Insteon Wi-Fi Cameras using a Buffalo Router
Follow the steps in this article to configure your Insteon Wi-Fi Camera for remote access. If the steps in this article do not match your specific router, consult your router's documentation.
Step 1
On your computer, open a browser and enter your router's IP address in the address bar. This address may be called Router IP Address or Default Gateway IP Address. If you do not know this information, follow the steps in this article to identify your router's IP address.
Step 2
You may see a log-in screen. Enter your router's user name and password. If you have never changed the password, try using the following:
User name: "root"
Password: Blank
Click OK to log in.
Step 3
Click the Add button located on the right side of the page.
Step 4
In the page that appears, enter the following information. The Local IP Address is the IP address of your Insteon Wi-Fi Camera.
TCP: 25106 (This should match the port given to your camera during camera setup)
UDP: 25106 (This should match the port given to your camera during setup)
LAN IP Address: Enter your Camera's IP Address
When ready, press Apply at the bottom of the page to save your changes.
Step 4
Test your connection by turning off Wi-Fi on your smartphone or tablet and attempt to control your WI-Fi Camera. If you can control your camera when on a cellular connection, then everything has been successfully configured.
Something Went Wrong While Configuring the Camera User Name
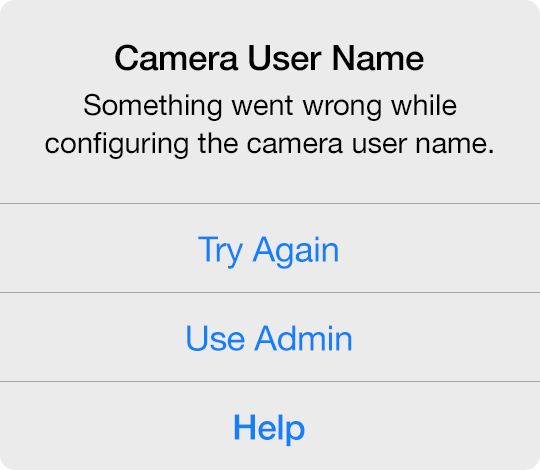
When configuring an Insteon Wi-Fi Camera, you may occasionally encounter a message informing you that something went wrong while configuring the camera user name. There are several reasons why this may occur.
- The user name was shorter than 1 character or longer than 12 characters
- The user name included characters other than numbers and letters
- The user name included spaces
The Insteon app should properly restrict entry of user names such that they do not contain any unsupported or invalid characters. If you are unable to resolve the user name adhering to the restrictions above, you can tap Use Admin to use the default camera user name "admin" and complete setup. After setup is complete, you can change the user name from Edit Camera.
Changing the Camera User Name from Edit Camera
Step 1
From Edit Camera, scroll down to Network Settings and tap Username.

Step 2
Replace admin with your desired camera user name. Ensure your user name meets the following criteria:
- Between 1 and 12 characters long
- Letters and numbers only
- No spaces
- Case sensitive

Step 3
Tap Done
The Insteon app will update your camera's user name and attempt to reconnect.

Basic Troubleshooting
If, after changing your camera's user name, the Insteon app is unable to connect to your camera, attempt setup of your camera again.
- Navigate to Edit Camera, scroll to the bottom and tap Delete Camera.
- Add a Device and choose Camera
- In the list of cameras, your camera should appear as already configured.
- Enter the new user name chosen in step 2 above. If you receive an error informing you that the user name or password is incorrect, try using the user name "admin" as it's possible the camera user name was not updated.
- If you are still unable to connect to your camera, follow the steps in this article to factory reset your camera and start again.
Configure HD Wi-Fi Camera Network Settings
Your camera's network settings are automatically configured for you when you add an Insteon Wi-Fi Camera. If you would prefer to configure your camera prior to adding it to the Insteon app, use your camera's web browser interface.
You can configure the following settings from the Insteon app:
IP Address
HTTP Port
You can configure the following settings from the camera's web browser interface:
DHCP
IP Address
Subnet Mask
Gateway IP Address
Primary DNS Server
Secondary DNS Server
HTTP Port
HTTPS Port
ONVIF Port
If you have already added your camera to the Insteon app, you should remove it before you make your changes. After you have completed your changes, re-add the camera as an already-configured Wi-Fi camera.
Step 1
Using Camera Tool, locate your camera on your network. Double click your camera in the list to open its web browser interface.
Step 2
Enter your camera's user name and password and click Login when ready.
Step 3
Click Settings
Step 4
From the left sidebar, click Network and then IP Configuration.
Step 5
Configure your network settings as desired. When ready, click Save.
Step 6
From the left sidebar, click Port.
Step 7
Configure your port settings as desired. When ready, click Save.